Introduction:
This was my first design project. For some reason in my head I wanted to create a centre diamond with rubies down the side of the shank. I had managed to pick up two 18ct rings from an auction site and thought I could make use of them by creating my own designs.
I started off by using Gemini, asking it for suggestions – if it had these rings, what would you create?
It gave me three design options, which I could then begin to grow on.
Contents:
The Donor stones
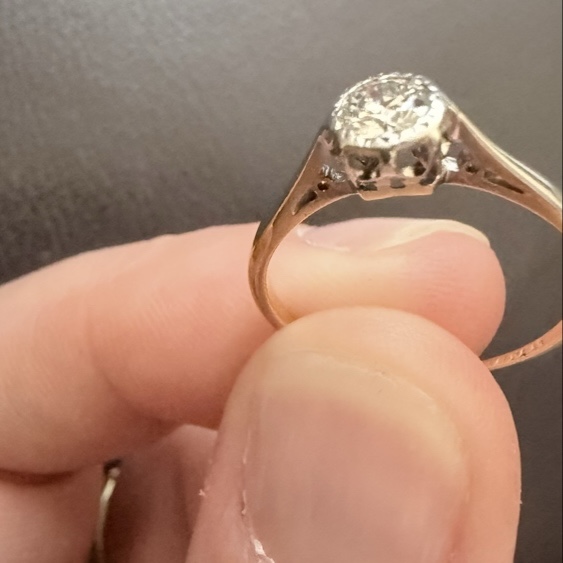
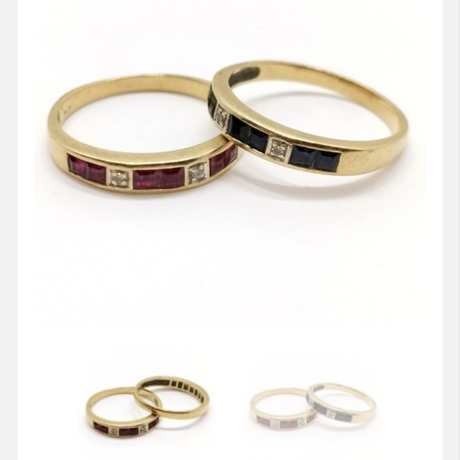
These are the original pieces which I was considering to have redesigned. The amount of 18ct gold could be recycled and the stones could be relieved from their settings.
Exploring Design styles
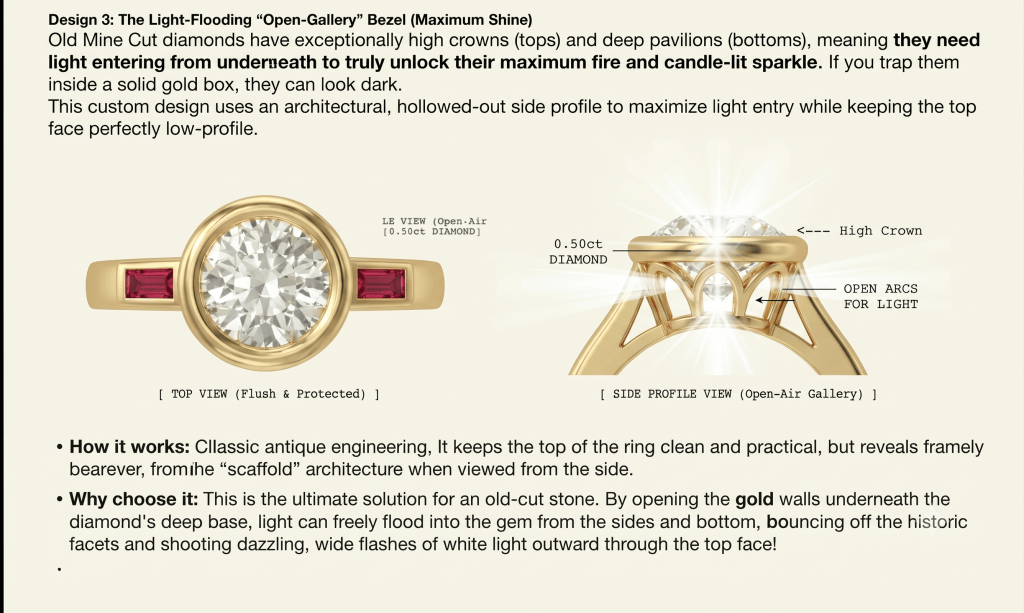
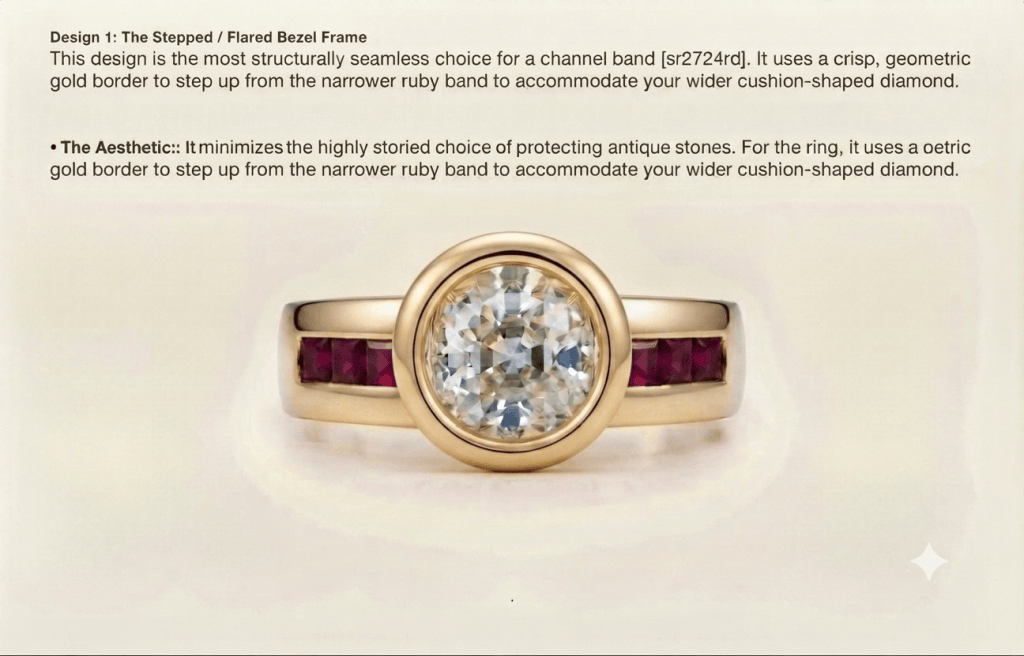
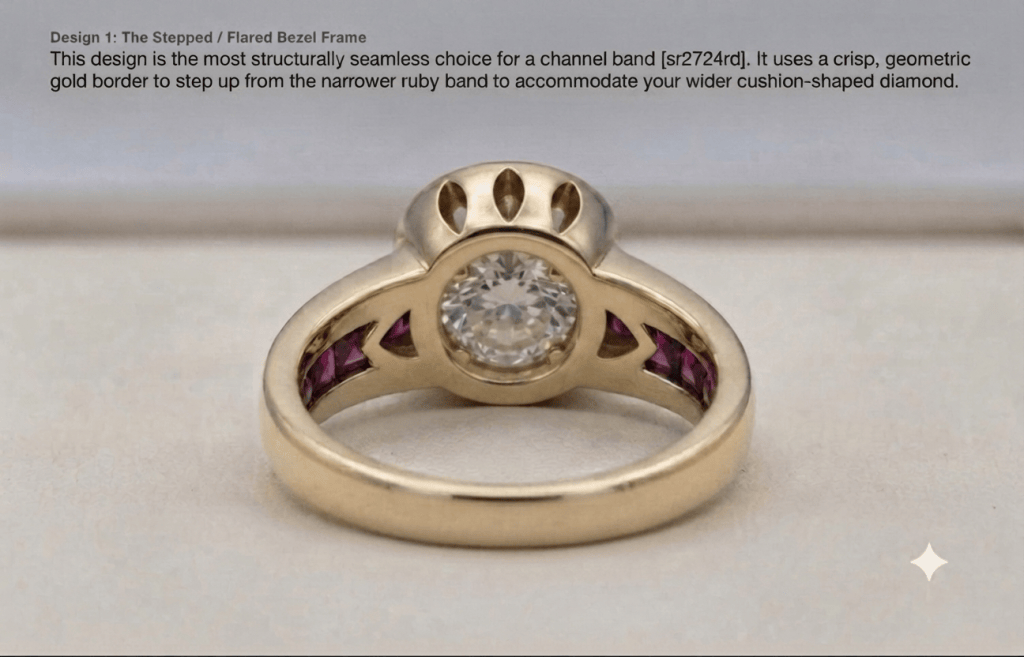
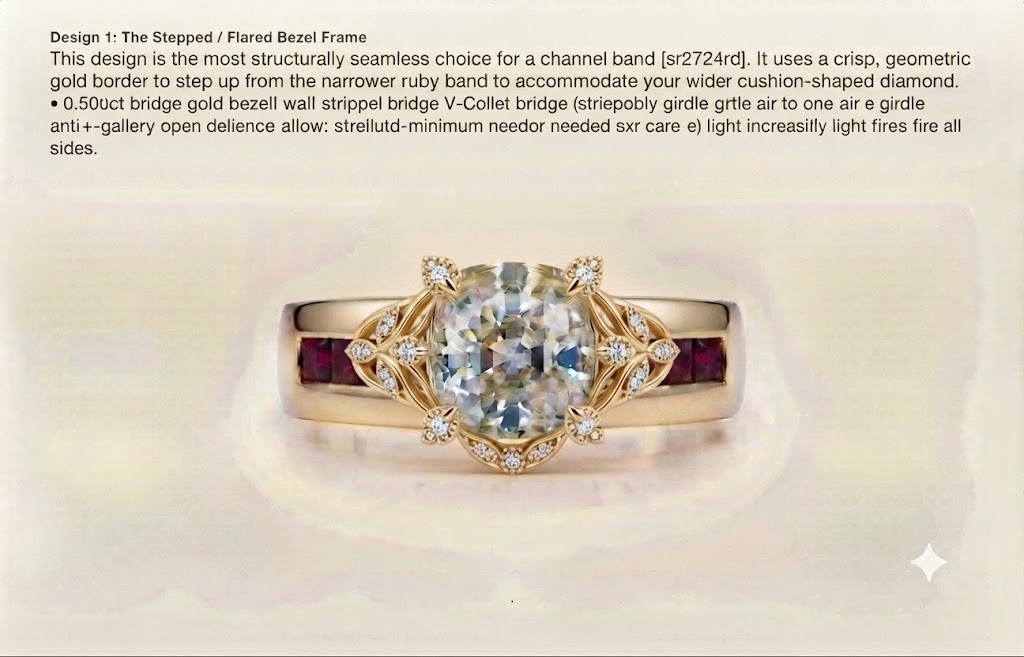
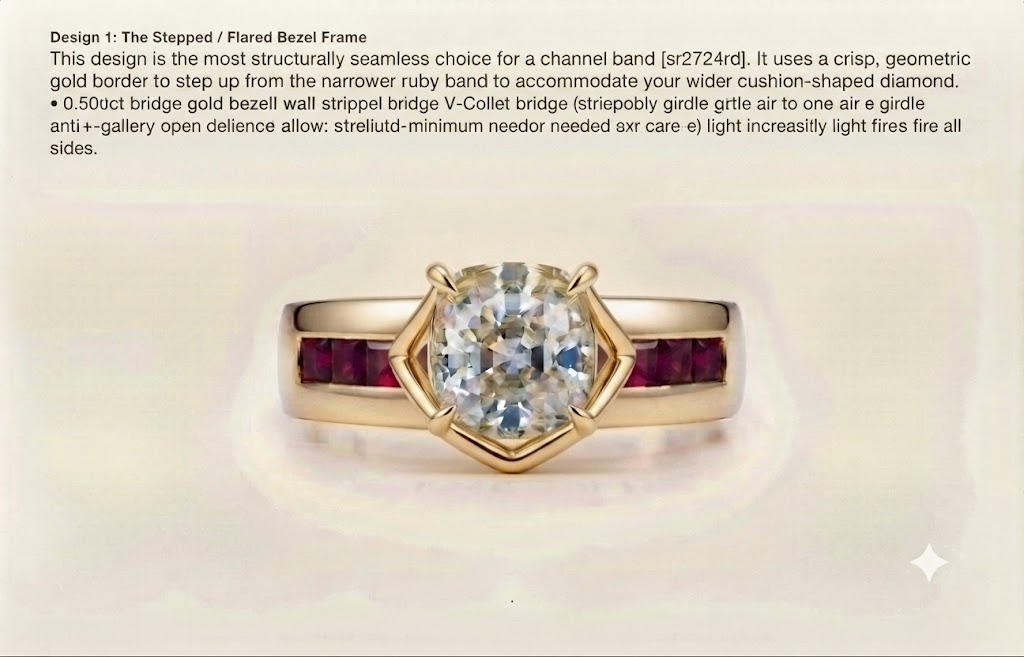
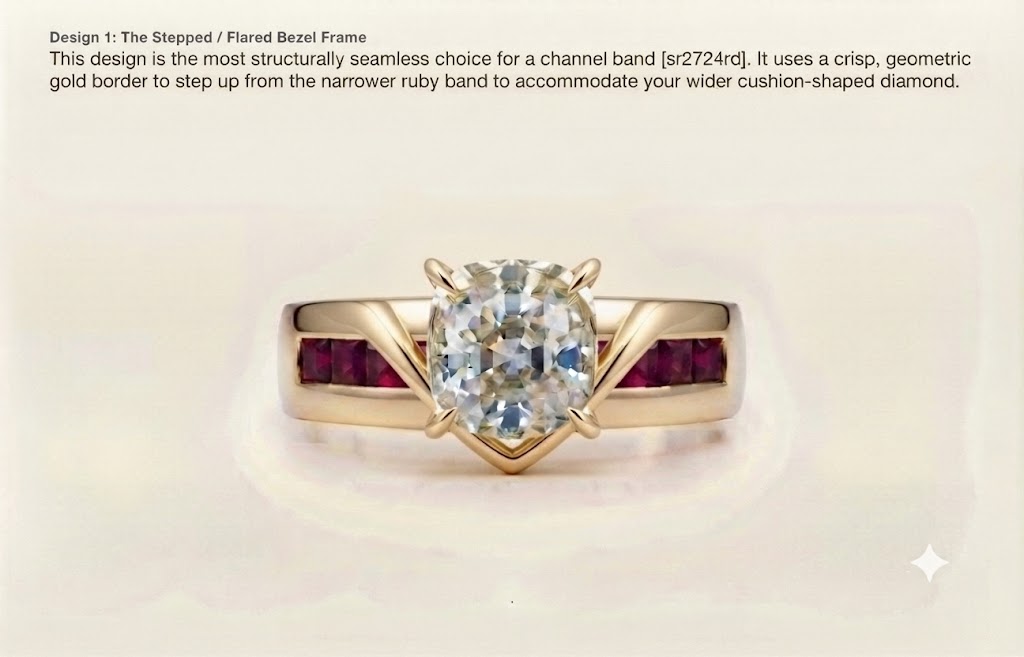
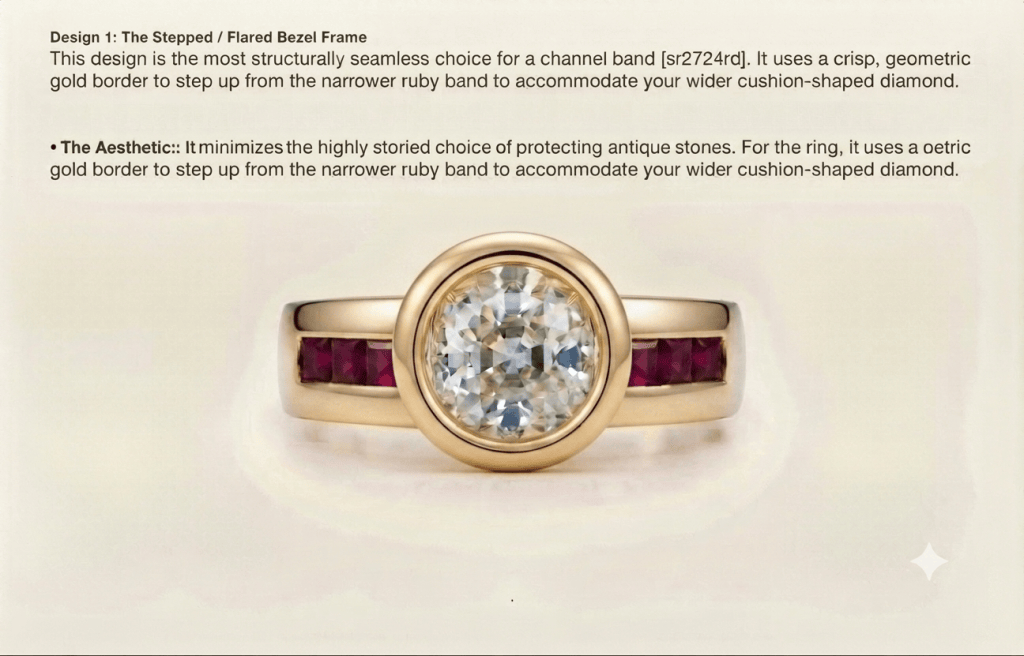
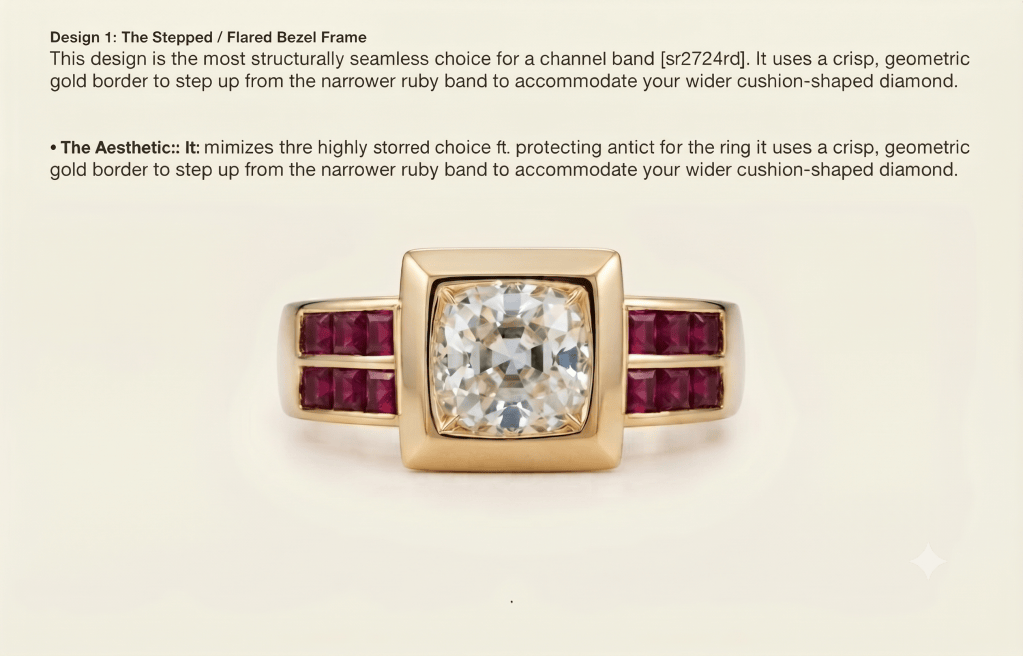
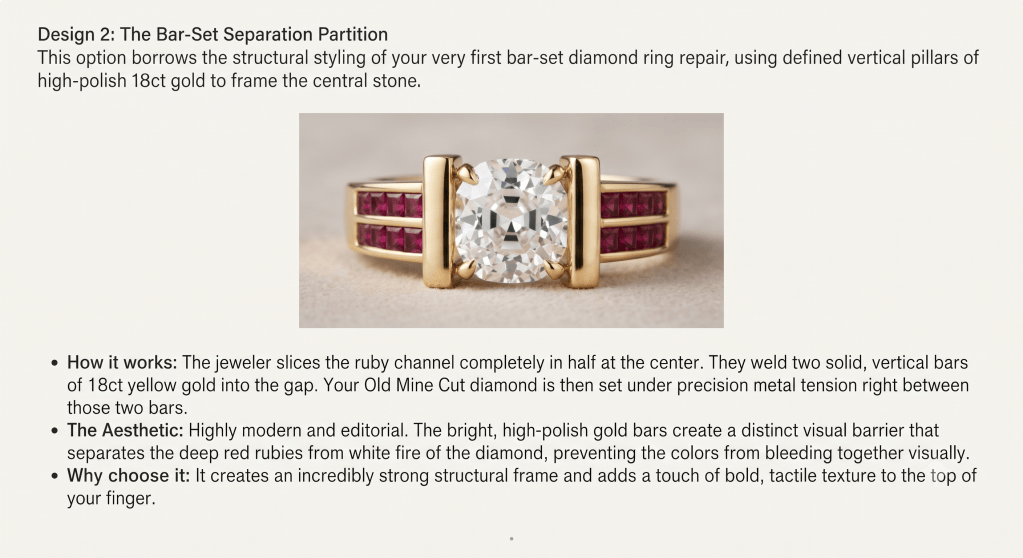
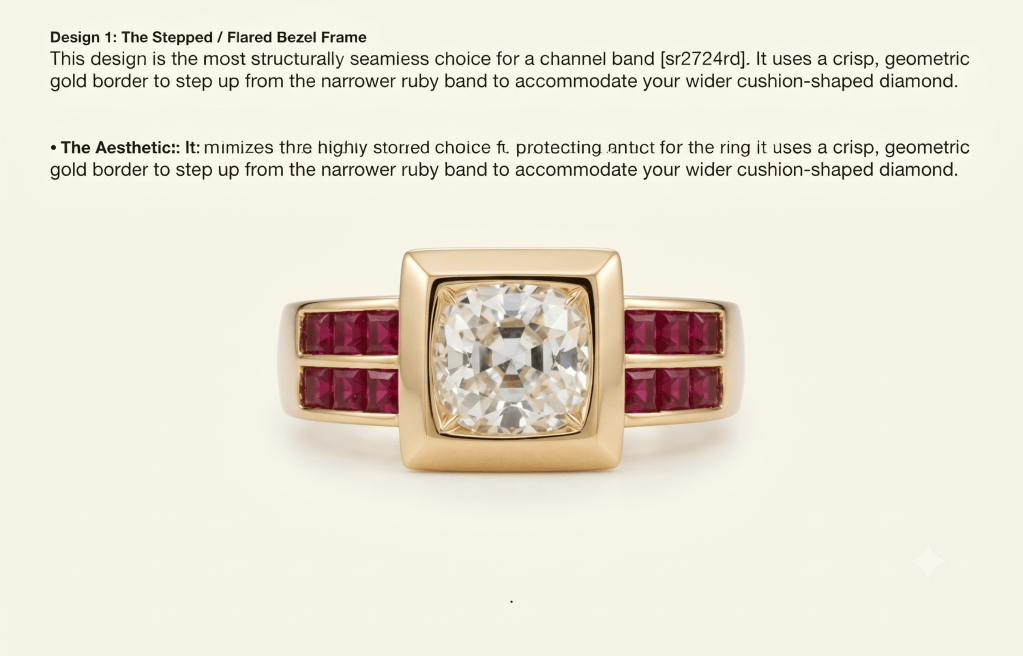
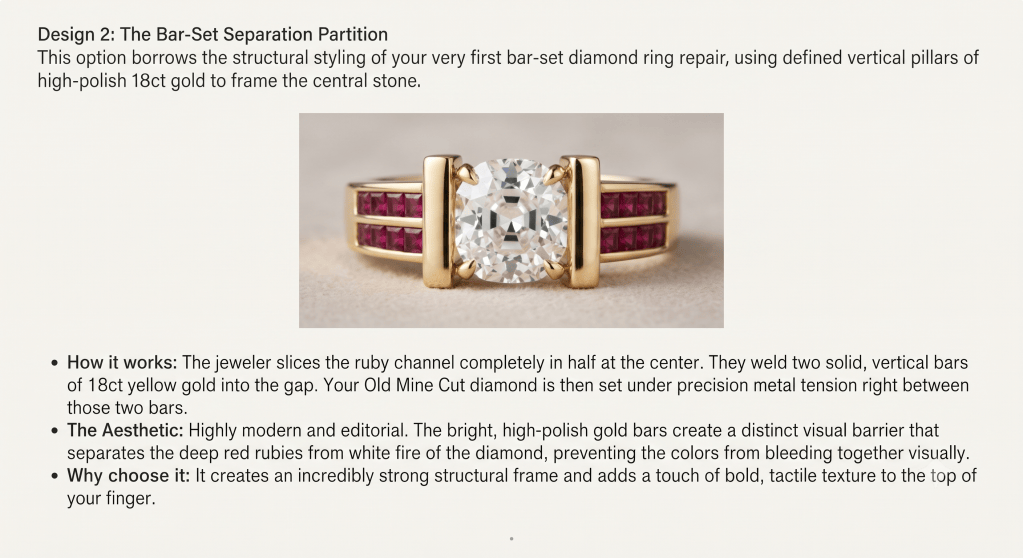
I was kind of hooked, but was realising the limitations of the Gemini renditions. I wasn’t able to find the words to quite get it to do what I wanted it to do. It would either put too many stones in, put extra lines where there shouldn’t be, it would create some pieces which had absolutely nothing to do with the design brief. I then began to notice the renditions starting to break, being put through the AI machine so many times. I gradually got to see that text which was initially legible and made sense in the beginning, began to produce spelling mistakes and created inconsistent grammar. I was beginning to see the limitations in which can be done.
Refining the design for limitations
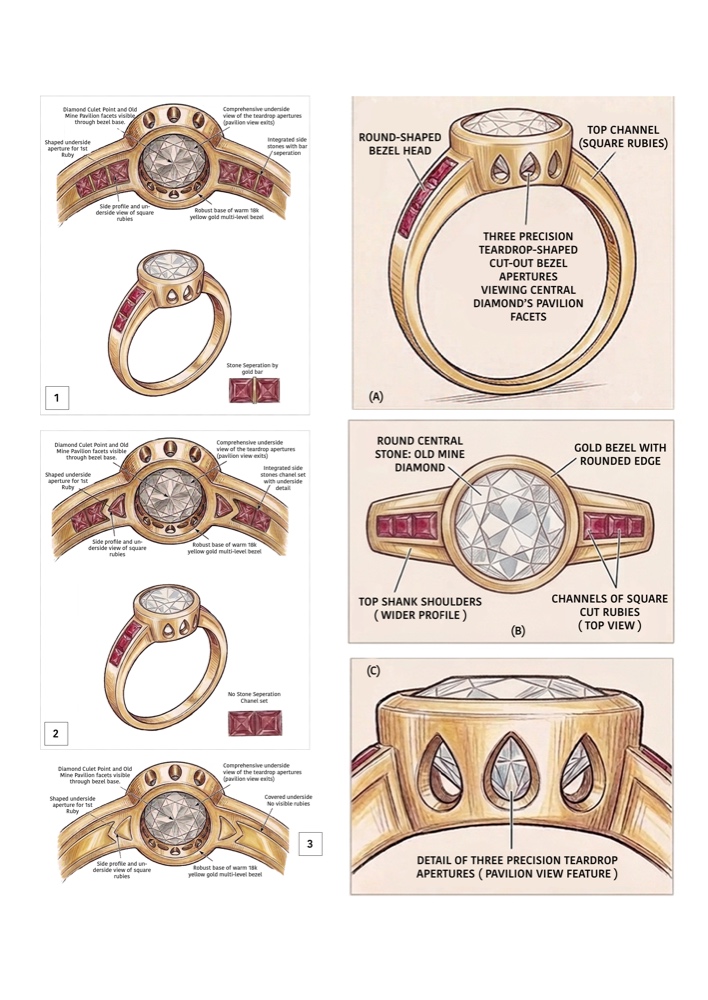
Specs:
18ct Yellow gold ring, with three side stones on the shoulder shank. The centre stone is a diamond, which is a bezel set, teardrop apertures for the most light for the stone. The design was still playing with a detailed under gallery on the shoulders to allow light into the rubies, and the rubies would be set in a channel setting for security. The middle bezel set diamond would be low to the finger to help reduce being caught on things.
After many renditions, I realised I needed to know what kind of budget it could cost to have something like this created.
Costs and budgets
Prompt: Ok can you give me a pricing breakdown of turning the diamond ring, the ruby ring and combining it to the custom designed ring
Response: Bespoke Remounting & Manufacturing Price Breakdown
Converting your existing source pieces—the 18ct gold ruby channel-set ring (sourced via auction for £290 for the pair) and the antique old mine diamond ring—into your custom-designed multi-level bezel ring involves specific material offsets and specialized bench labor.
Below is an estimated professional UK goldsmith pricing breakdown for melting down the existing 18ct gold, utilizing your supplied gemstones, and hand-crafting the complex custom design (featuring a rounded bezel head, three side teardrop cut-out apertures, and three channel-set square rubies on each shoulder).
1. Material & Component Offset
Cost impact: £0 for stone purchase, as you are supplying the primary and accent stones.
Supplied Gold (18ct Yellow Gold): The source rings provide approximately 5.3g total weight of 18ct gold. Melting and refining this existing metal covers the bulk of the casting weight required for a standard-to-robust shank, though a minor casting alloy top-up fee may apply if additional metal is needed for the multi-level bezel structure.
Supplied Gemstones (Client-Owned):
$1\times$ Antique Old Mine Diamond (reused from the diamond ring).
$6\times$ Square-cut rubies ($3$ per side, harvested from the ruby ring).
| Service / Process | Description | Estimated UK Cost (£) |
| CAD Design & 3D Modeling | Translating the multi-level bezel, precise side teardrop apertures, and channel shoulders into a production-ready digital CAD model. | £120 – £180 |
| CAM / Wax Printing & Casting | 3D wax growth, investment casting preparation, and melting/pouring the recycled 18ct gold into the custom framework. | £90 – £150 |
| Benchwork & Complex Fabrication | Hand-piercing the three precision teardrop-shaped cut-out apertures on the bezel sides, shaping the multi-level gallery, and fitting structural bars. | £200 – £350 |
| Stone Setting | Precision setting the central old mine diamond into the custom rounded bezel head and secure channel-setting the six square rubies. | £150 – £250 |
| Finishing & Polishing | Expert clean-up of internal apertures, high-polish finish on the warm 18ct yellow gold, and quality inspection. | £60 – £90 |
3. Estimated Cost Summary
- Estimated Labor & Manufacturing Range: £620 – £1,020
- Net Project Cost (Including Original Source Material Acquisition):
- If factoring in the £290 auction cost for the source rings, your total investment to bring this bespoke piece to life sits between £910 and £1,310.
Simplifying the design
I realised that the costs of the design far surpass what the ring would be worth and my markup was beginning to look closer to a retail costs, despite me being able to provide majority of the materials for the project.
The main costs were in the design details: Having the custom teardrop apertures and the undercut shoulder shanks were causing the price to inflate beyond what I could imagine. I had no skill in CAD design, and didn’t really understand what that meant. I just knew it involved creating the design on a computer. I had no idea how to reduce the costs unless I simplified the aspects of the design which were causing the pricing to inflate.
Prompt: “Is there a way to simplify my ring design to lower the cost?”
Response:
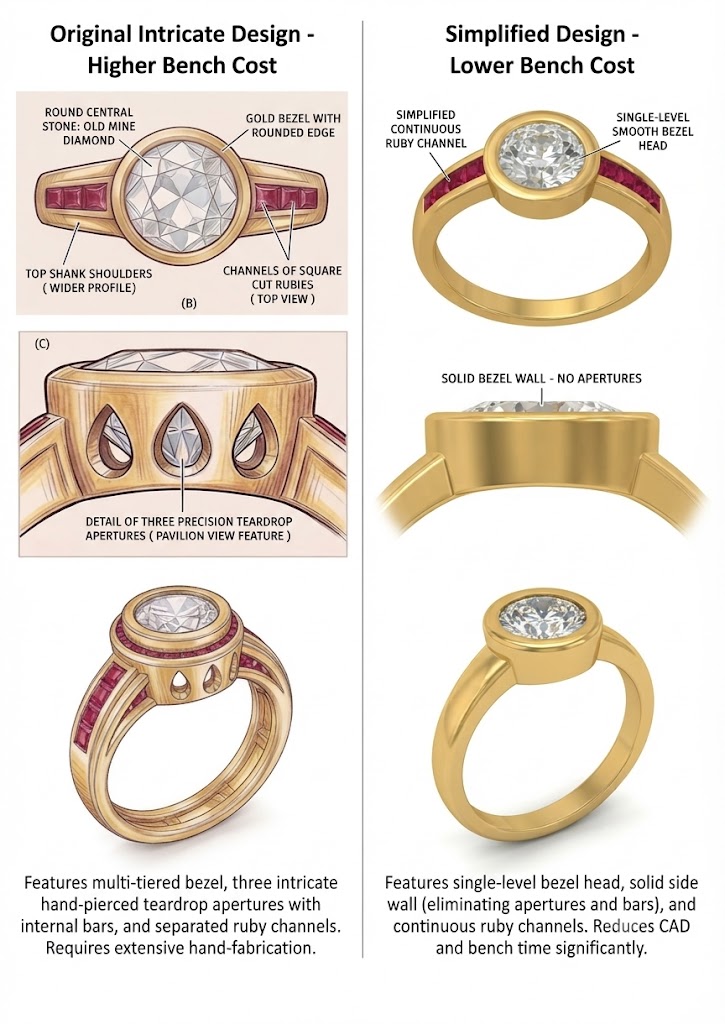
Yes, you can significantly reduce the labor and bench costs by modifying some of the most intricate architectural elements. Because hand-crafting complex negative spaces and multi-tiered metal requires extensive precision benchwork, simplifying these areas will lower the overall goldsmith estimate.
Here are the most effective ways to streamline your design for cost savings:
- Modify or Remove the Side Teardrop Apertures:
- Current design: Three precision hand-pierced teardrop cut-outs on each side of the bezel with internal structural bars to view the diamond’s pavilion facets. This is one of the most time-consuming parts for a bench jeweler (requiring delicate hand-piercing, filing, and fitting).
- Simplification: Switch to a solid bezel wall (which eliminates the side cut-outs entirely) or opt for a single, simpler open window or gallery wire instead of three individual teardrops.
- Streamline the Multi-Level Bezel Structure:
- Current design: A stepped, multi-level warm 18ct gold bezel head.
- Simplification: Use a clean, single-level flush bezel that wraps smoothly around the old mine diamond without the extra tier drops, reducing both CAD modeling time and casting complexity.
- Simplify the Ruby Channel Shoulders:
- Current design: Channels featuring individual gold separation bars between the square rubies.
- Simplification: Keep the channel-set rubies, but make them a continuous, seamless channel without the tiny individual gold separation bars between each stone.
Estimated Cost Impact
Simplifying the side apertures and bezel tiers could reduce the complex benchwork and fabrication estimate by roughly £150 to £300, bringing your labor range closer to £450 – £720.
Which of these features—the side teardrop cut-outs or the multi-level bezel structure—are you most attached to keeping in the final piece?
Prompt: I don’t want a multi tiered bevel
Response:
Dropping the multi-tiered structure in favor of a clean, single-level bezel head while keeping your preferred three teardrop side apertures provides the ideal middle ground. This design eliminates the complex stepped layers of the bezel while preserving the unique side windows that showcase the diamond’s pavilion facets.
Revised Cost & Financial Breakdown
1. Updated Bespoke Goldsmith Labor & Manufacturing
- Single-Level Bezel with Teardrop Apertures & Channel-Set Rubies: £530 – £850 (This reduces CAD and bench complexity by removing the multi-tiered steps, while still accounting for the custom hand-piercing of the three side teardrop windows).
2. Total Project Financial Summary
Final Net Out-of-Pocket Total: £691 to £1,181
Total Upfront Spent (Purchases + 30% Auction Fees): £791
Adjusted Labor Cost: £530 – £850
Total Combined Project Cost: £1,321 to £1,641
Less Expected eBay Resale Recovery: Minus £460 to £630
Refining AI design aspects
As already discovered, when trying to add specialist requests to Gemini to alter specific parts of a design, it would not know what to do, or make elaborate changes to the design. I needed to find a way to try and overcome this issue to help streamline the amount of renders I have to make. This is not only because it does take time to create them, but my plan with Gemini is included as part of an offer on my phone contract. It eventually limits how many images can be produced and if I hit my limit, I have a timer to wait till I can continue.
I know AI doesn’t actually know what it is creating. It can give a very good guess, but it is limited because it doesn’t recognise what an object actually is. You would think this is a problem when designing such an intricate thing like a ring, but I needed a logical solution for a creative problem:
I began to highlight the parts which I wanted to change:
Prompt: In the green circle on ring 1: edit so that it is a more tapered shank. in the pink circle on the ring: remove the line across the diamond and reduce the rubies on the shoulder of the ring from four to three. Lastly, in the blue circle: the ring needs to have three square rubies in the shank, and the aperture slit is on the wrong side, it should be on the front and back and not on the shoulders. please correct all of these points thank you
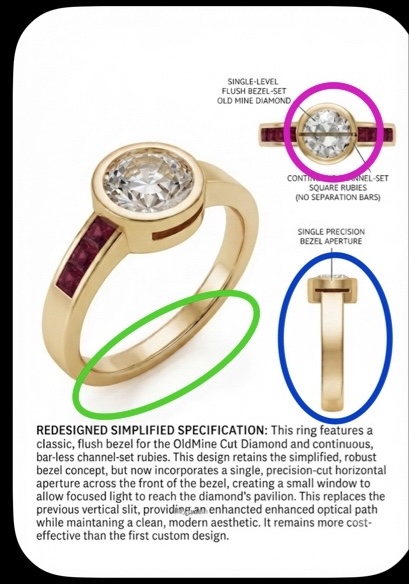
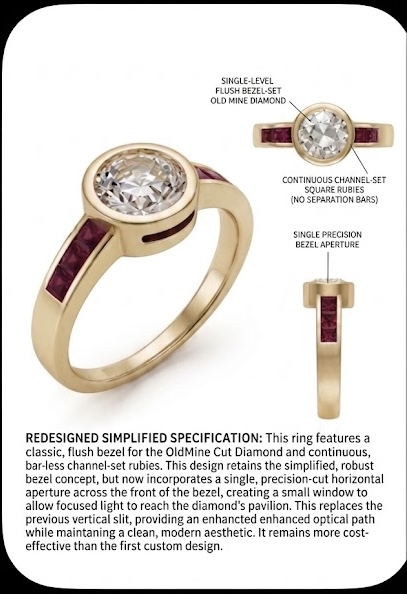
With this new knowledge that I could define certain aspects of a design by highlighting what needed to be fixed, I knew that I would be able to create more designs much more easily. I needed to remember that the technology needed to know where, how and what was changing before it could create the parameters to fix. I was now going to hopefully waste less renders on my limit and get less frustrated with the technology when it spits out the same image every time.
The Final Design
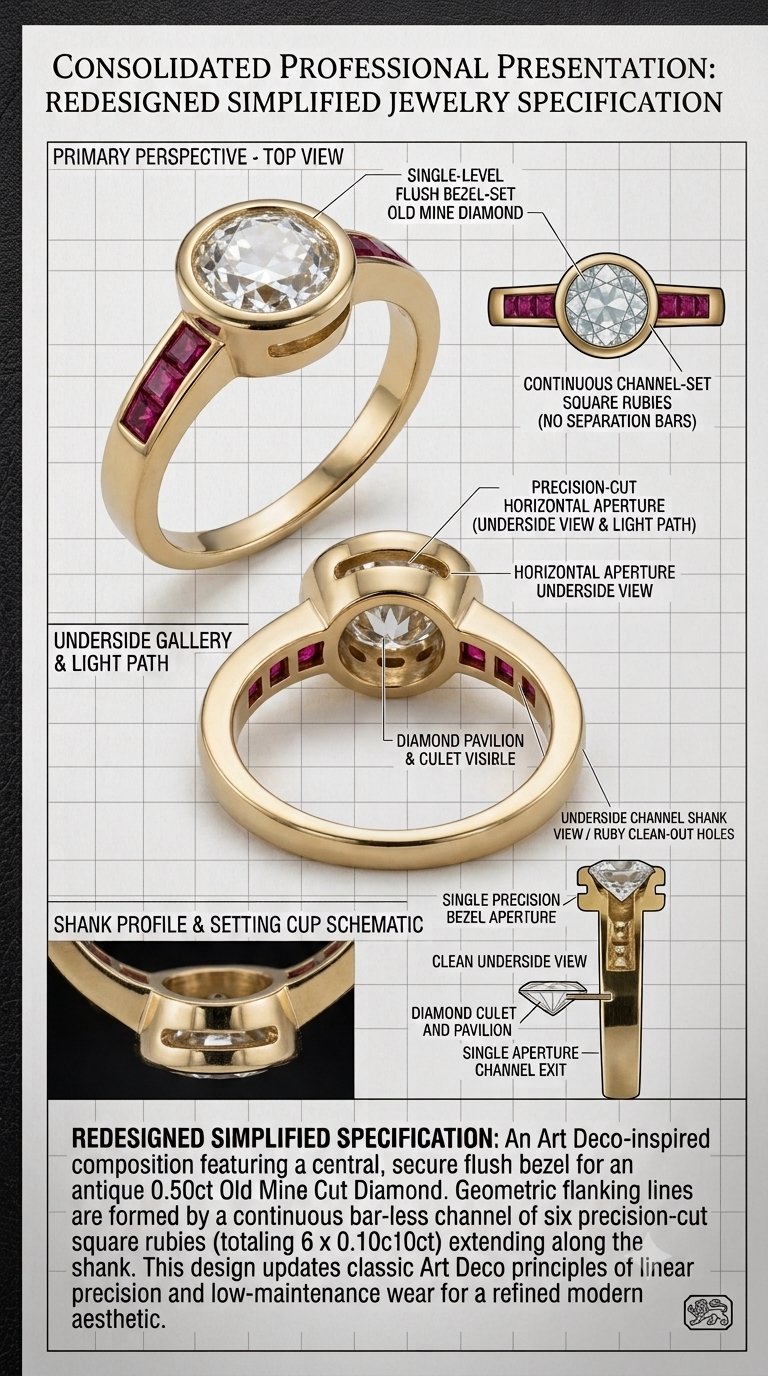
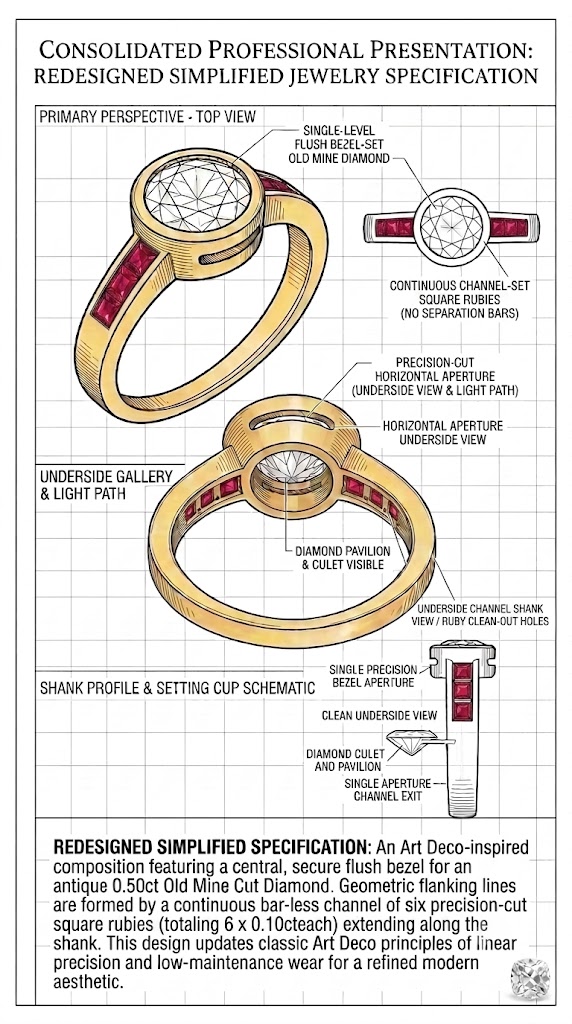
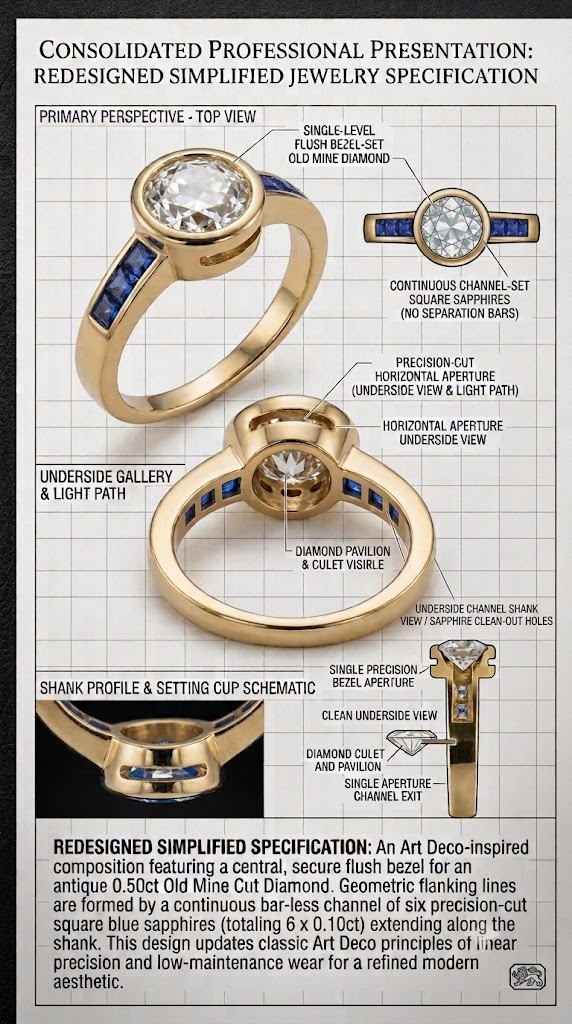
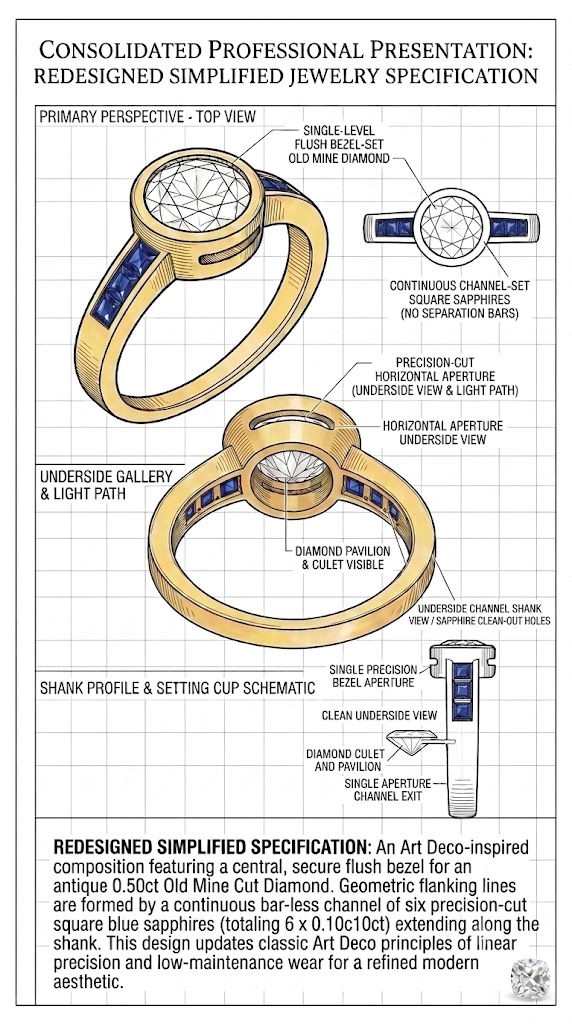
I had finally arrived at a design I loved, it was low profile, it had the correct amount of stone, a more cost effective gallery aperture and a safe stone bezel design. One last edit which I created was a sapphire rendition. This is mainly because I had originally settled on the ruby stone, but now as I have been able to understand a little bit about how to get prompts working well, I could now visualise what both options could be look like. I requested it to be made as if it was a drawing as well as a realistic version:
Querying CAD design
Prompt: One last question- with the last image are you able to produce a CAD design or is that not in your skills yet?
Response:
Generating 3D CAD (Computer-Aided Design) files—such as .STL, .3DM, or .STEP files—is outside my current capabilities. As an AI model, I can only generate 2D images and text specifications rather than the actual 3D geometric mesh files required for direct 3D printing or CNC milling.
However, the 2D technical specification sheet we’ve put together serves as an ideal reference document for a bench jeweler or CAD designer!
If you want to take this to a jeweler, they will typically use software like MatrixGold, RhinoGold, or JewelCAD to build the 3D model based on these specs.
To help speed up the process with your jeweler, here are the key parameters you can hand over to them alongside the drawing:
- Center Stone: ~0.50ct Old Mine Cut Diamond (flush bezel-set)
- Side Stones: 6 x 0.10ct precision-cut square rubies (continuous bar-less channel setting, 3 per side)
- Design Details: Art Deco-inspired linear shank, horizontal light-path apertures under the bezel, clean underside channel exit / clean-out holes.

